All you Need is Love

All you Need is Love
Mother's Day 2013

Monday, March 24, 2014

Kid Created Disney Autograph Books

          My son is especially interested in getting autographs from Disney characters, even playing at home that he is different characters and giving us his autograph. He even tries to talk in the different character's voices. He's hilarious. Getting autographs in a book was fun for both of my kids, but I wanted them to be able to make it their own, with the picture I took of them and the characters alongside it when it was all said and done. On our last visit to Disney World, I brought journaling blocks for the kids and some photo safe markers. An added bonus was that choosing the right color paper and pen for the character they were waiting in line to see made the time go a little faster. I had put stickers on some of the papers ahead of time, knowing that we would see certain "people".
         Once we were home from our trip and ready to reminisce, I got the pictures printed and bought them each their own photo safe tape runner. I had scrapbooks on hand that I got them years ago, not knowing what for. Next, I got out the Disney stickers. I have quite a collection of photo safe stickers, but I didn't let them go through my stuff, instead I gave them a few options to choose from, so they could still get what they wanted. My 11 year old daughter finished both her entire tape runner and  her photo album in one sitting. She didn't want to mat any of her pictures, or add anything. She felt that the autograph and the photo were enough. She may have added a few stickers, but not on every page. My 5 year old son however took 3-4 days to finish his album. He was very careful with his tape runner, and really like adding embellishments. He came up with some clever ideas, like adding an eye to an "M" for the Monsters Inc. monsters. The pages shown here are his  pages.
 I remember scrapbooking with my daughter at the same age, and I think she liked it a lot more then. Perhaps if I made it a regular activity, she would spend more time on it.
Another great thing about these albums was that it gave them someplace to put the extras they had gathered. There was a baseball type card from Wreck it Ralph & Vanellipe, and a bookmarker from Belle. These books truly are a scrapbook, because the pages aren't covered. (which isn't ideal, but as this isn't for posterity, it will suffice.) My little man enjoys looking through his album. It's something they put their own personal touch on that they can keep to remind them of their trip.
 
Products used: 
 
photos ordered online from York Photo
 
small scrapbooks from Ikea,
 
 stickers from various places, most bought at Downtown Disney World stores over the years
 
Creative Memories journal blocks and pens
(characters need thick pens so that they can grip them. However I did run into a few character handlers that wanted me to use their pen which wouldn't write on the costume. I just pushed for using my own photo safe pen & they let us.)


Thursday, February 20, 2014

I'm Baaaaaaaaack!

I helped a friend of mine make her own digital album today and it made me all the more anxious to do some work on my own album. I actually did finish an album recently, with the pictures from our beach vacation last year. I have been ordering strictly through York Photo Labs, because they have great specials and I can often get my albums printed for 60% off the normal price. They are the least expensive maker of digital albums and yet I am very happy with their quality. I also have found that if you have an issue with a book, they are very good about giving a replacement. This may all be boring for you, and I'm sorry! I just really rely on reviews personally, and I wanted you to know why I am sold on York.
My daughter, who was used to my making her a really thick and HEAVY album twice in a year, has been very disappointed by my negligence in scrapbooking. But although I feel guilty when I think about it, I still know deep in my heart that it is more important to be living life than to be scrapbooking it. I mean, since I have to choose!

So here are a few of my favorite pages from my latest digital album. Our Beach Vacation
 I often make custom cover books, but I made a window book this time and liked how it turned out.
 It's so easy to make one of your pictures into a background for your page, like I did above. I actually take pictures specifically to be used as background now.
 I really liked this page. I like that I can add clip art for free. That beats stickers!
Another example of the picture being the background. This reads, " Your sibling is the only other person who knows exactly what growing up in your family was really like."

One of my favorite pictures of us at the beach.
 
I find I can get a page done here and there, and I like not having to get everything out like stickers and paper and photos. I have to be saving money not buying all those things, too.
But don't give up on me, die hard scrapbookers! I still have a box of pictures printed out and several books still in their wrappers waiting for me to finish someday.
When I write next, I'd like to write about scrapbooking traditionally WITH my kids, as I was able to share this hobby with them last month. I also hope to share some Disney photography tips in the upcoming blogs.
If you have any questions, please ask!

Monday, November 29, 2010

Baking up Both Pages and Cookies

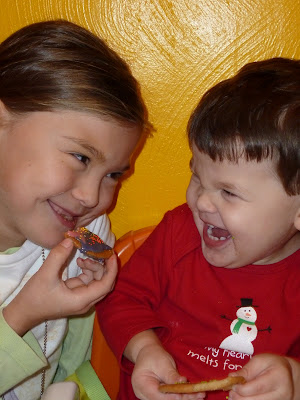
My kids enjoying the Christmas Cookies I made

I'm still trying to get all caught up on my daughter's album. Although I have been working hard, I'm not sure I'll be caught up to this Fall in her books by the time we leave for vacation. Christmas has pushed it's way up to the front of my thoughts as well. I received a new camera as an early Christmas present and I have a lot to learn about it. I already like that it takes pictures with a flash, as my old camera was not doing too well taking indoor photos this entire year. With my Canon, I could tilt the camera and the photo would change from horizontal to verticle, making it best for reviewing your pictures. But my Panasonic doesn't. :( I'm not used to all the buttons yet, but I'll get there.

I am currently scrapbooking photos of the spring. I did 23 pages on Saturday! I repeat the phrase, "Simple pages, Completed albums" when I find myself dawdling or trying to create something too complicated, as I tend to do.

Tip of the Day: Don't be afraid to use your pictures as embellishments instead of stickers. For example: I took pictures of the eggs my kids dyed and punched the photos with a small square punch. I made a border of yellow paper and stuck the egg squares down the center of the strip. I have also used my daugher's art, her chosen pumpkin, flowers at a park or even animals we saw. It's hard to find the right sticker sometimes, but your pictures will be sure to match. You can always cut something out of paper. While it definately will take longer thatn slappin on a sticker, paper embellishments are unique and you can choose the exact color to match your photos or page design as well.

Scrap Happy!

Sunday, November 14, 2010

The good, the bad, and scrapbooking

Our last day of the tripday 3 of being bitten

2nd to last day, unable to keep anything down


I have been scrapbooking an awful lot. I haven't been completing my 7 pages a day lately because I found that the only way to do that was to stay up very late at night and I was getting exhausted and grumpy. So, I have been doing what I can. I finished my daughter's Disney vacation from last year (taking up 1 1/2 albums) This vacation contained some of the hardest pages for me to scrapbook. It was that reason that I had trouble getting through it. We had a rough time on our vacation last year, having bed bugs for a week. My daughter was bitten the longest and had the worst effect from it, so it was difficult to scrapbook and journal about that. I know things could be worse, but while I'm mindful of that, it doesn't make it any easier!


Today marks a year since we first found the bite marks on her and began the week (and a day) of misery. It was fitting that I sat down with her tonight and read her the just completed scrapbook for the first time. I usually try to keep things positive in my kid's albums. This time, I did something that I haven't done before. I told the story of our vacation as I always do, including some of the bad, but not all, and then on the last page, I typed out the story from my point of view. I wrote honestly and included every detail I hadn't added previously. At the end of it, I really stressed to my daughter that in life, bad times do happen and that I hoped that she would remember that there were good memories made as well. As I finished reading it to her, she leaned back against me and smiled. Her eyes were a little wet, but she didn't say a word.
Scrap Happy!

Wednesday, November 03, 2010

Tips on Hiding your Imperfections

Just as I hide my son't too long hair under a hat, I find the need to disguise or hide things in my scrapbooking.


Hiding imperfections using black and white /Sepia. On this page, (above) I used Sepia to bring the focus on Snow white and my daughter. There are several people in the background and they could be distracting. I felt that the Sepia gave this a classic feel. I sometimes change the shade to B& W or sepia if I'm trying to hide the fact that there is too much light in a picture. I had a photo of my daughter from a night time parade that was too washed out. When I changed it to Black and white, you couldn't tell.


Cover the flab! I purposely covered my belly with the giant blue hat when I put this page together. There's nothing wrong with that!
Red eyes: I don't use fancy photo correction tools, just the ones that come on my free picture sights such as Snapfish and York. (Both are the same set up) But I don't think that the red eye correction works well, so I don't use it. Instead, I use a red eye pen from CM. You might not feel like it's doing anything, but just dab the eye carefully and gently and you will see a change.


Journalling mistakes: I hate when I make a mistake when journalling! Sometimes I cover up my mistake with a cleverly placed sticker. I also have plain cover up stickers that match my pages from CM. Sometimes, I'll move a photo down a little bit to cover an "oops!" If you are writing on black with one of the pens from CM especially designed to write on black, you are usually able to use an eraser to fix your ill placed mark. It's also OK to leave your mistakes. It shows that you are human, and it shows the kids that you handwrote in the album. In todays age, that is becoming more and more rare.
ScrapHappy!


Don't Ignore the Signs!

Ever since I started to scrapbook digitally, it has changed the way I take pictures. I take a lot more pictures now that I can use as a background or "sticker" of sorts. I like to take pictures of all kinds of things and add them to my traditional scrapbooks, too. The above picture is of my husband and daughter in a restraunt. I took a pic of the sign outside the restraunt and adhered it to the picture.
Below: I used the "Celebrate Today" picture as a decoration for my journaling box. Believe it or not, this was a napkin that I took a photo of!


Another sign is used on this page as a title sticker of sorts.


I have been a scrapbooking fiend lately. My goal is to complete 7 pages a day and I have been pretty close to meeting that goal. I am so tired some days because I scrapbook mainly after I put the kids to bed and I can spend an hour on a page design easily. I'm working on Disney pages. I have created a lot of pages that I like. Coming soon: Scrapbooking Ideas Specifically for Disney Parks, Tips on Hiding your Imperfections and Making your Photos and Pages Blend Together.
Scrap Happy! I am!

Sunday, October 10, 2010

Harvest Memories

We went to the Pumpkin Patch yesterday, and I took a lot of pictures. I have placed some of my favorites here. It's interesting that in most of these pictures, my kids aren't even looking at me! That is actually the way I wanted it to be. This way, they are comfortable, without noticing the hulking camera in their face. My darling daughter with the big gap in her smile. She lost her 2nd front tooth over the weekend.
My sweet boy, looking so tiny compared to those pumpkins!


As a boy, he loves anything with a motor and wheels!

Showing his sister a baby pumpkin. He hated having to put it back in the bin.


Trying to pick up pumpkins in the pumpkin patch. I always try to get candid shots here.


Looking for the perfect pumpkin.


It's so much fun to go to the pumpkin patch!
When I realized that I had but a few short months until the end of the year, I started uploading pictures to York to get printed, and scrapbooking the ones I had on hand. I had scrapbooked pages and pages months ago that still needed journalled as well. So, I went into scrapbooking mode with a vengence! It didn't last, even though I had decided to complete 5 pages a day. When I was a CM consultant, we always told people to start with their most recent pictures and work backwards. I followed that advice and finished my daughter's school pictures from 3rd grade. I felt like I was cheating, but it was nice to get something done! I laid out the pages for the beach vacation I just took in August, and those will be next. It was nice that my daughter was able to look at the pages I had just journalled and placed into a book. She spent a good deal of time reading and looking at the pictures. I'm sure it makes her feel good that I spent that time on her. So much more to do and so little time! Scrap happy!


Saturday, October 09, 2010

Autumn page layouts

I'm blaming Blogger for the sideways pics as always. Just don't know what their deal is sometimes, but whatever! This top picture is a cool idea that you can use any time of the year. We were being silly and I put the camera in front of the bathroom mirror, so we could see ourselves, and set the auto timer. We made silly faces and I chose these 4. Does it remind you of the booths at the mall? Let me tell you, we had a ball doing this!
The top picture is a close up and the bottom picture is of the full page. My idea was this, to have it look like leaves had piled up in the corner of the page. I found paper that had leaves on it and used it for the corner. I punched leaves out of this paper using 2 different punches and placed them all along the edge of the orange paper to make it look like a pile. So simple, but pretty time consuming. If you are looking for a fast page, this isn't it! I don't have a picture, but I also matted a picture to look like it was framed in hay. This was also time consuming, but worth it in my opinion. This is why I'm so far behind in my scrapbooking, though!

It might be time consuming, but it sure is fun!